Achieving a truly perfect reverse creaming vanilla cake can be a culinary goal for many. This method involves coating the flour in butter first.
This technique creates a cake that is impossibly tender and moist. The texture is fine and velvety. This reverse creaming vanilla cake method is considered a game-changer for anyone who bakes.
This method ensures a flat, even top. This makes it perfect for a stacked layer cake. It can help avoid dome issues. The results can be quite impressive. I tested this recipe many times in my kitchen, and it never disappoints.
I enjoy how reverse creaming vanilla cake feels professional yet easy. With the right steps, anyone can create bakery-style cakes at home. This one always earns compliments.
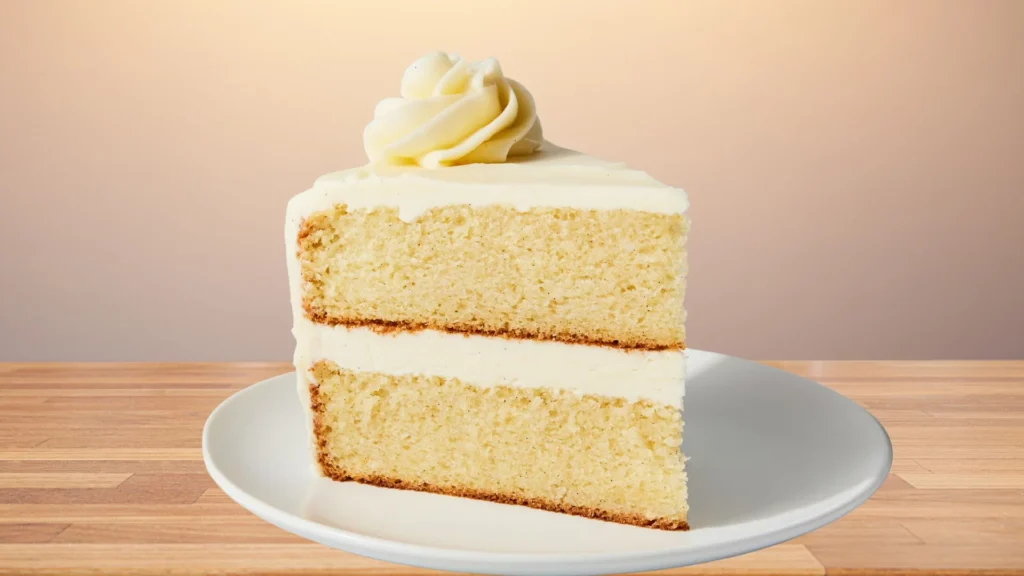
Reverse Creaming Vanilla Cake
The reverse creaming vanilla cake uses a unique method where butter is mixed directly with dry ingredients first. This coats the flour and slows gluten development, creating an incredibly soft and tender crumb.
The cake is moist thanks to sour cream and milk, with a rich, buttery vanilla flavor that feels classic and comforting. It bakes evenly with a smooth, flat top, making it perfect for layering and frosting.
The texture is velvety and delicate without being crumbly. This reverse creaming vanilla cake is my favorite when I want a reliable, elegant vanilla cake that’s simple to make but impresses every time.
How To Prepare Reverse Creaming Vanilla Cake?
Prep Time: 20 minutes
Bake Time: 35 minutes
Total Time: 55 minutes
Course: Dessert
Cuisine: American
Yield: 10 servings
Kitchen Utensils
- Stand mixer or hand mixer
- Mixing bowls
- Measuring cups & spoons
- Sifter or fine-mesh sieve
- Rubber spatula
- 2 x 9-inch cake pans
- Cooling rack
- Offset spatula (for frosting)
- Parchment paper
Ingredients
For the Vanilla Cake:
- 2½ cups (312g) all-purpose flour
- 1¾ cups (350g) granulated sugar
- 1 tbsp baking powder
- ½ tsp salt
- ¾ cup (170g) unsalted butter, room temperature, cut into small cubes
- 4 large eggs, room temperature
- 1 cup (240ml) whole milk, room temperature
- ¼ cup (60ml) sour cream or plain Greek yogurt
- 1 tbsp pure vanilla extract
For the Vanilla Buttercream Frosting:
- 1 cup (227g) unsalted butter, softened
- 4 cups (480g) powdered sugar, sifted
- ¼ cup (60ml) whole milk or heavy cream
- 2 tsp pure vanilla extract
- ¼ tsp salt
How To Make
Step 1: Prep Your Equipment and Ingredients
Start by preheating your oven to 350°F (175°C). Grease two 9-inch cake pans and line them with parchment paper for easy release. For best results, bring your milk, eggs, and butter to room temperature before you begin.
Step 2: Sift and Mix Dry Ingredients
In a large mixing bowl, sift together the flour, granulated sugar, baking powder, and salt. Whisk briefly to make sure everything is evenly combined.
Step 3: Add Butter to Dry Mix (Reverse Creaming)
Drop the cubed, room-temperature butter straight into the dry mixture. Using a stand mixer with the paddle attachment (or a hand mixer), beat on low speed until the mixture looks like coarse, sandy crumbs. This reverse creaming method helps coat the flour with butter, keeping the cake tender and soft.
Step 4: Combine Wet Ingredients
In another bowl, whisk together the milk, sour cream (or yogurt), eggs, and vanilla extract until smooth and well blended.
Step 5: Add Wet Ingredients in Stages
With your mixer on low speed, slowly pour in half of the wet mixture. Increase the speed to medium and beat for about 1 minute until the batter looks light and fluffy. Gradually add the remaining wet ingredients and mix until just combined. Be careful not to overmix here.
Step 6: Pour and Smooth the Batter
Divide the batter evenly between the prepared cake pans. Use a spatula to gently smooth the tops for even baking.
Step 7: Bake the Cake
Place the pans in your preheated oven and bake for 30–35 minutes, or until a toothpick inserted into the center comes out clean. If you’re making cupcakes instead, they’ll bake in about 18–22 minutes.
Step 8: Cool Completely
Let the cakes rest in their pans for 10 minutes before carefully turning them out onto a wire rack. Allow them to cool completely before adding frosting.
Step 9: Make the Vanilla Buttercream
In a large bowl, beat the softened butter on medium speed for about 3 minutes until creamy. Slowly add sifted powdered sugar, one cup at a time, mixing well after each addition. Then pour in the milk (or cream), vanilla, and a pinch of salt. Beat on high for another 2–3 minutes until the buttercream is light, fluffy, and smooth.
Step 10: Frost the Cake
Once your cakes are completely cool, spread or pipe the vanilla buttercream as desired. Layer, swirl, and decorate to your heart’s content!
Notes: Room temperature ingredients ensure better emulsion and smoother batter. The reverse creaming method gives the cake a tighter, velvety crumb great for layered cakes that need structure. Sour cream or Greek yogurt adds moisture and richness, but it’s optional. Be careful not to overmix the batter after adding the eggs.
Nutrition Facts Of Reverse Creaming Vanilla Cake
| Nutrition | Amounts |
|---|---|
| Calories | 520 |
| Fat | 27g |
| Saturated Fat | 16g |
| Cholesterol | 120mg |
| Sodium | 210mg |
| Carbohydrates | 66g |
| Sugar | 47g |
| Protein | 5g |
Why You’ll Love This Recipe
You’ll love this reverse creaming vanilla cake because it consistently delivers superior results, even for novice bakers.
The unconventional method produces a reverse creaming vanilla cake with a uniquely tender and velvety texture that simply melts in your mouth.
Its buttery richness is balanced by a perfectly fine crumb, avoiding the dryness or toughness sometimes found in traditionally made cakes.
➤ Beautifully flat layers: A perfectly flat top makes frosting and stacking a dream, giving your layer cakes a professional, polished look without any fuss or waste.
➤ Less risk of error: Since the method is less sensitive to over-mixing, you can worry less about developing too much gluten and ruining the texture.
➤ Exceptional moisture: The initial coating of flour with fat locks in moisture, resulting in a cake that remains tender and delicious for days.
➤ Versatile base: This recipe creates a wonderfully sturdy yet delicate cake that can be easily paired with different frostings and fillings to suit any occasion.
Serving Suggestions For Reverse Creaming Vanilla Cake
The delicate, velvety crumb of a reverse creaming vanilla cake makes it a wonderfully versatile dessert. Here are some delightful ways to serve it:
◆ With Vanilla Buttercream: As provided in the recipe, a classic vanilla buttercream is always a winner. Its sweetness and creamy texture complement the cake’s fine crumb beautifully.
◆ Fresh Berries: A simple scattering of fresh, seasonal berries like strawberries, raspberries, or blueberries adds a burst of freshness and a lovely contrast in color and flavor.
◆ Whipped Cream: A dollop of lightly sweetened whipped cream provides a lighter, airier accompaniment to the rich cake.
Health Benefits Of Reverse Creaming Vanilla Cake
Reverse creaming vanilla cake is a delicious treat, but it also has some benefits. The method helps create a lighter, more tender cake by coating the flour with butter, which reduces gluten formation. Adding sour cream or Greek yogurt adds moisture and a small boost of protein and calcium.
While it’s still a dessert and should be enjoyed in moderation, the improved texture means you get a satisfying, less dense cake that feels more wholesome.
This technique makes your reverse creaming vanilla cake feel special without extra fuss or unhealthy additions.
Additions
➢ Citrus zest: Add the zest of one lemon, lime, or orange to the sugar before mixing with the butter. This will infuse the entire cake with a bright, fresh flavor that perfectly complements the vanilla.
➢ Spices: Incorporate warm spices like a teaspoon of cinnamon, a half teaspoon of nutmeg, or a quarter teaspoon of cardamom into the dry ingredients. These spices add a layer of cozy warmth and complexity to the simple vanilla base.
➢ Milk powder: For a more concentrated, milkier flavor and a sturdier, silkier crumb, add 1 to 2 tablespoons of dry milk powder to the dry ingredients. It subtly enhances the taste without overpowering the vanilla.
➢ Chopped nuts or chocolate chips: Fold up to one cup of toasted, chopped nuts (like pecans or almonds) or chocolate chips into the batter before baking. For best results, toss them with a tablespoon of flour first to prevent them from sinking.
➢ Vanilla bean paste: For a more intense vanilla flavor and a beautiful speckled appearance, substitute the vanilla extract with an equal amount of vanilla bean paste.
Is A Reverse Creaming Cake Denser Than A Traditional One?
Yes, reverse creaming cakes are typically slightly denser than cakes made with the traditional creaming method.
While traditional creaming whips a lot of air into the batter, the reverse method focuses on coating the flour with fat. The result is a cake that is moist and tender but with a tighter, more substantial crumb.
Can The Reverse Creaming Method Be Used For Any Cake Recipe?
No, the reverse creaming method should only be used for recipes specifically developed for it. The technique works best with “high-ratio” recipes, where the sugar content is equal to or greater than the flour content by weight.
Using it with a standard recipe can result in a dense cake that doesn’t rise correctly.
Why Does The Batter Look Curdled Or Separated?
The most common cause of a curdled batter in this method is using ingredients that are not at room temperature. If the milk, eggs, or butter are too cold, the ingredients will not emulsify properly.
This can cause the batter to look separated and result in a dense, gummy layer at the bottom of the finished cake.
Can All-Purpose Flour Be Used For A Reverse Creaming Cake?
Yes, all-purpose flour can be used, but many bakers suggest using cake flour for best results. Cake flour has a lower protein content, which further minimizes gluten formation and enhances the cake’s tender crumb.
If all-purpose flour is the only option, a substitute can be created by swapping a couple of tablespoons of flour for cornstarch to reduce the protein content.
Storage Instructions
Let the cake cool completely before storing. Wrap the cake tightly in plastic wrap or place it in an airtight container to keep it fresh. Store at room temperature for up to 2 days.
For longer storage, refrigerate the cake, wrapped well, for up to 5 days. If refrigerated, bring the cake to room temperature before serving to restore its softness.
You can also freeze the unfrosted cake layers by wrapping them in plastic wrap and aluminum foil; freeze for up to 2 months.
Conclusion
My easy method for making this delicious reverse creaming vanilla cake truly simplifies the baking process without sacrificing flavor or texture.
By following these steps, you can create a moist, tender cake that looks and tastes like reverse creaming vanilla cake came from a bakery. I hope you try this recipe soon and enjoy the amazing results as much as I do.
When you bake reverse creaming vanilla cake, please let me know how reverse creaming vanilla cake turns out I’d love to hear about your experience and any personal twists you add! Happy baking!
More Cake Recipes You’ll Love
Chocolate Vanilla Layer Cake – Multi Layer
Cherry Vanilla Cake Recipe – Sweet And Creamy
Vanilla Cake With Mousse Filling [Easy Recipe]
Vanilla Mayonnaise Cake Recipe | Fluffy And Delicious
Sourdough Vanilla Cake Recipe [Starter Discard]
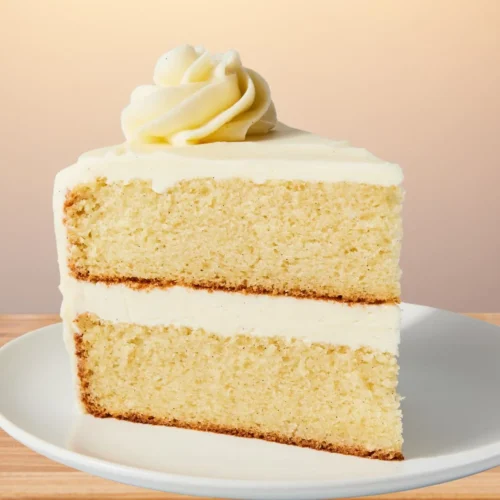
Reverse Creaming Vanilla Cake
Equipment
- Stand mixer or hand mixer
- Mixing bowls
- Measuring cups & spoons
- Sifter or fine-mesh sieve
- Rubber spatula
- 2 x 9-inch cake pans
- Cooling rack
- Offset spatula (for frosting)
- Parchment paper
Ingredients
For the Vanilla Cake:
- 2½ cups 312g all-purpose flour
- 1¾ cups 350g granulated sugar
- 1 tbsp baking powder
- ½ tsp salt
- ¾ cup 170g unsalted butter, room temperature, cut into small cubes
- 4 large eggs room temperature
- 1 cup 240ml whole milk, room temperature
- ¼ cup 60ml sour cream or plain Greek yogurt
- 1 tbsp pure vanilla extract
For the Vanilla Buttercream Frosting:
- 1 cup 227g unsalted butter, softened
- 4 cups 480g powdered sugar, sifted
- ¼ cup 60ml whole milk or heavy cream
- 2 tsp pure vanilla extract
- ¼ tsp salt
Instructions
Step 1: Prep Your Equipment and Ingredients
- Start by preheating your oven to 350°F (175°C). Grease two 9-inch cake pans and line them with parchment paper for easy release. For best results, bring your milk, eggs, and butter to room temperature before you begin.
Step 2: Sift and Mix Dry Ingredients
- In a large mixing bowl, sift together the flour, granulated sugar, baking powder, and salt. Whisk briefly to make sure everything is evenly combined.
Step 3: Add Butter to Dry Mix (Reverse Creaming)
- Drop the cubed, room-temperature butter straight into the dry mixture. Using a stand mixer with the paddle attachment (or a hand mixer), beat on low speed until the mixture looks like coarse, sandy crumbs. This reverse creaming method helps coat the flour with butter, keeping the cake tender and soft.
Step 4: Combine Wet Ingredients
- In another bowl, whisk together the milk, sour cream (or yogurt), eggs, and vanilla extract until smooth and well blended.
Step 5: Add Wet Ingredients in Stages
- With your mixer on low speed, slowly pour in half of the wet mixture. Increase the speed to medium and beat for about 1 minute until the batter looks light and fluffy. Gradually add the remaining wet ingredients and mix until just combined. Be careful not to overmix here.
Step 6: Pour and Smooth the Batter
- Divide the batter evenly between the prepared cake pans. Use a spatula to gently smooth the tops for even baking.
Step 7: Bake the Cake
- Place the pans in your preheated oven and bake for 30–35 minutes, or until a toothpick inserted into the center comes out clean. If you’re making cupcakes instead, they’ll bake in about 18–22 minutes.
Step 8: Cool Completely
- Let the cakes rest in their pans for 10 minutes before carefully turning them out onto a wire rack. Allow them to cool completely before adding frosting.
Step 9: Make the Vanilla Buttercream
- In a large bowl, beat the softened butter on medium speed for about 3 minutes until creamy. Slowly add sifted powdered sugar, one cup at a time, mixing well after each addition. Then pour in the milk (or cream), vanilla, and a pinch of salt. Beat on high for another 2–3 minutes until the buttercream is light, fluffy, and smooth.
Step 10: Frost the Cake
- Once your cakes are completely cool, spread or pipe the vanilla buttercream as desired. Layer, swirl, and decorate to your heart’s content!
Notes
Nutrition Facts Of Reverse Creaming Vanilla Cake
| Nutrition | Amounts |
|---|---|
| Calories | 520 |
| Fat | 27g |
| Saturated Fat | 16g |
| Cholesterol | 120mg |
| Sodium | 210mg |
| Carbohydrates | 66g |
| Sugar | 47g |
| Protein | 5g |

Hi! I’m Sophia, your trusted cake guide with years of hands-on baking experience. I’m passionate about creating delicious and wholesome cakes that bring happiness to every occasion and home. Whether you’re a beginner or seasoned baker, I’m here to share tips, recipes, and inspiration to make your baking journey enjoyable and rewarding. From classic flavors to healthy twists, my goal is to help you discover the joy of baking and sharing beautiful cakes with family and friends.